最近很常看到這種把相片變成一顆小型地球的有趣相片, 到底這種相片該怎麼做呢? 本文就來告訴大家。
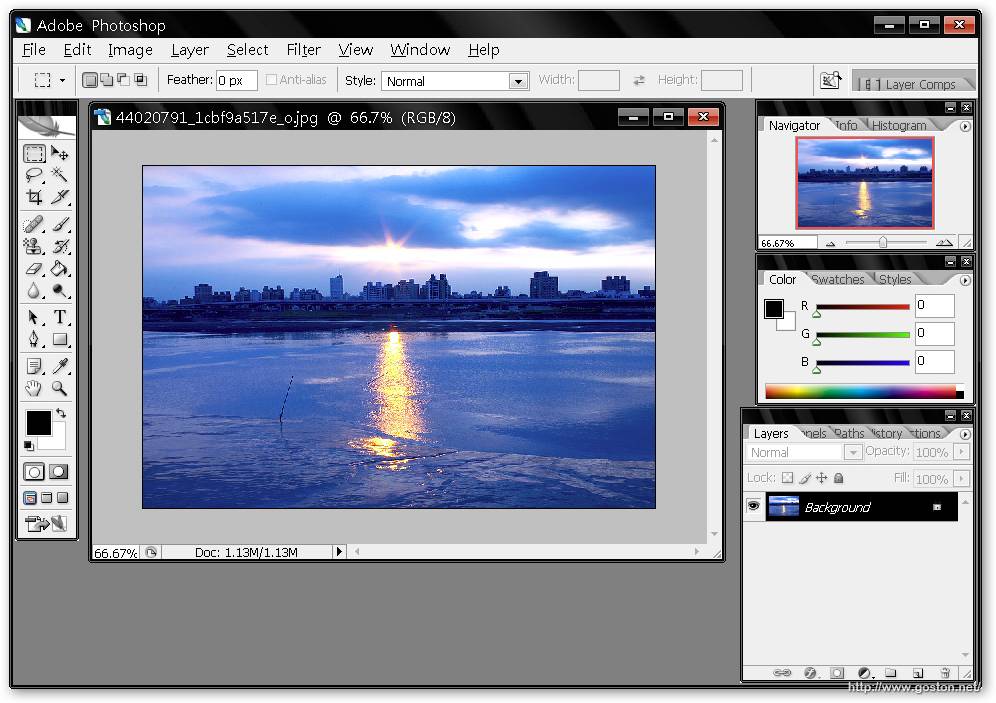
首先開啟一張欲做成小地球的相片:
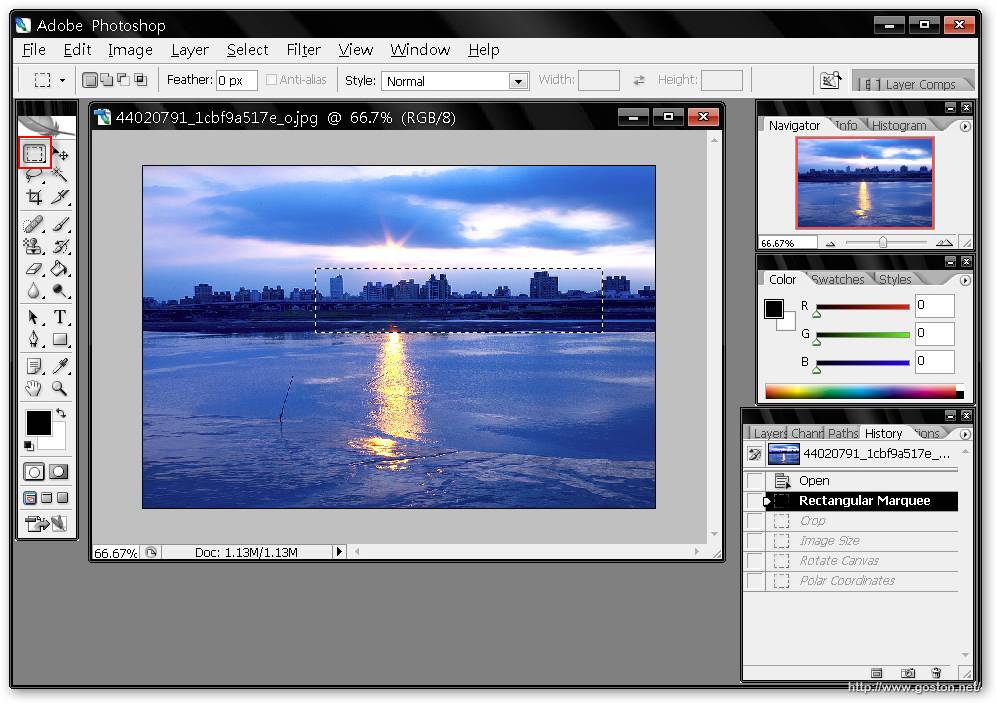
利用矩形選取工具選出欲做成地球的部份 (最好包含天空):
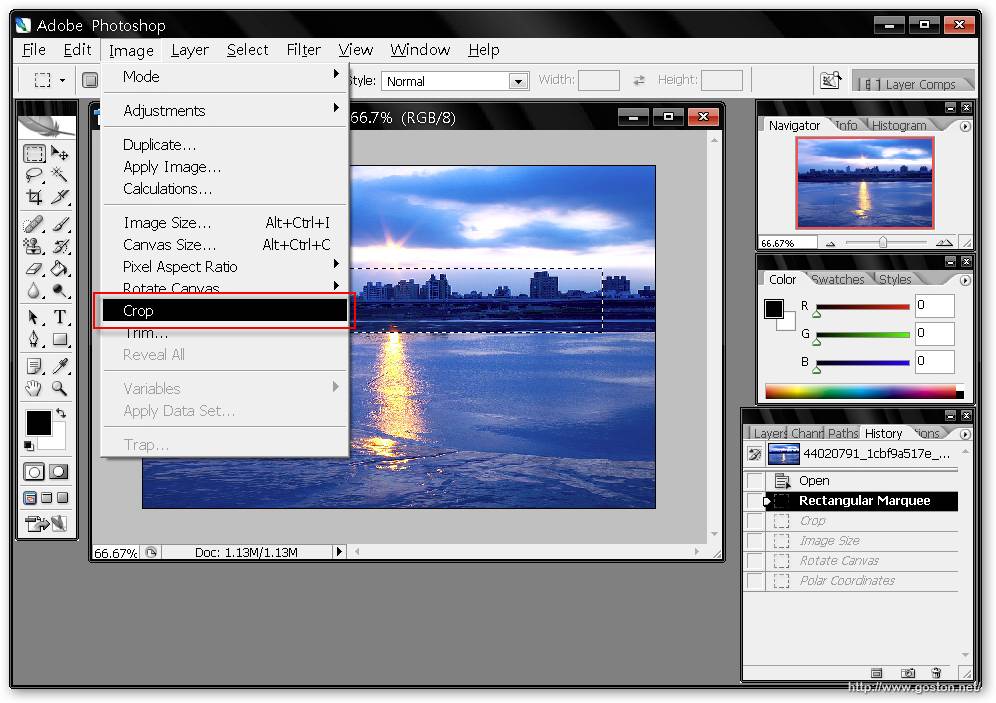
將選取的部份裁切下來:
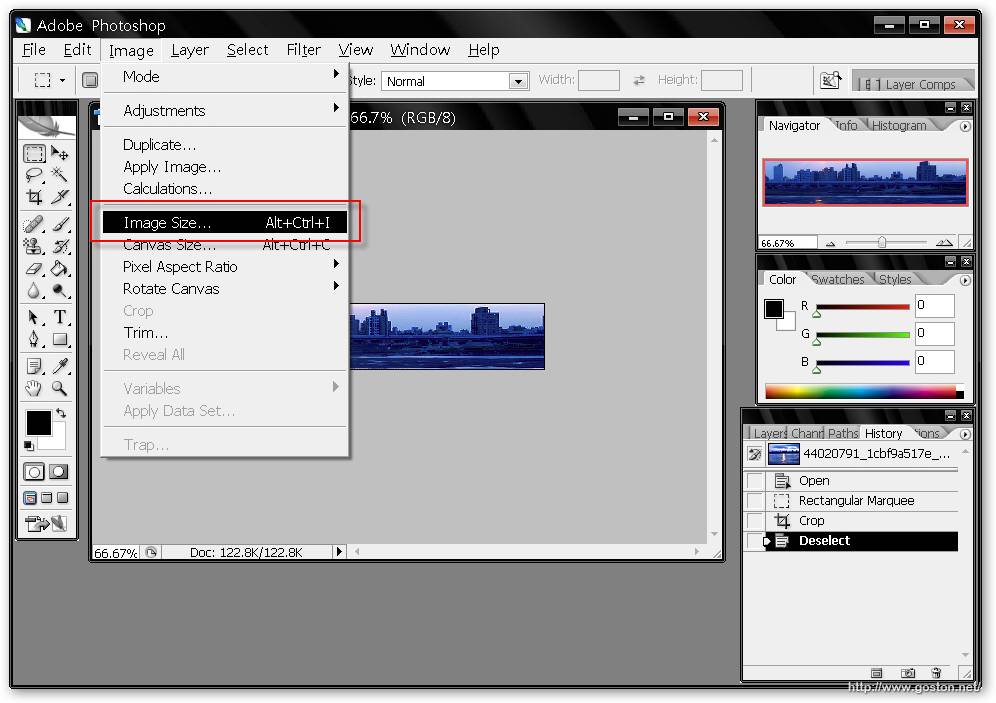
選擇調整影像大小:
將影像的寬度或高度設成較長邊的數值, 使影像變成一個方形, 下方的「
Constrain Proportions
」記得取消勾選:
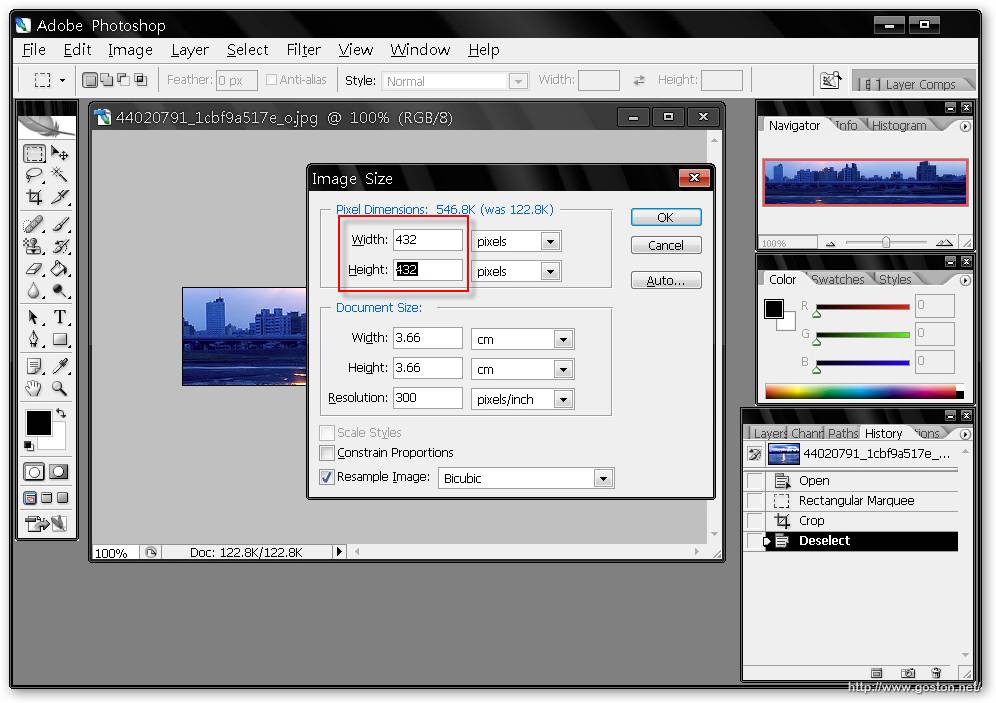
按下「
OK
」鍵後就能發現影像被調整成方形:
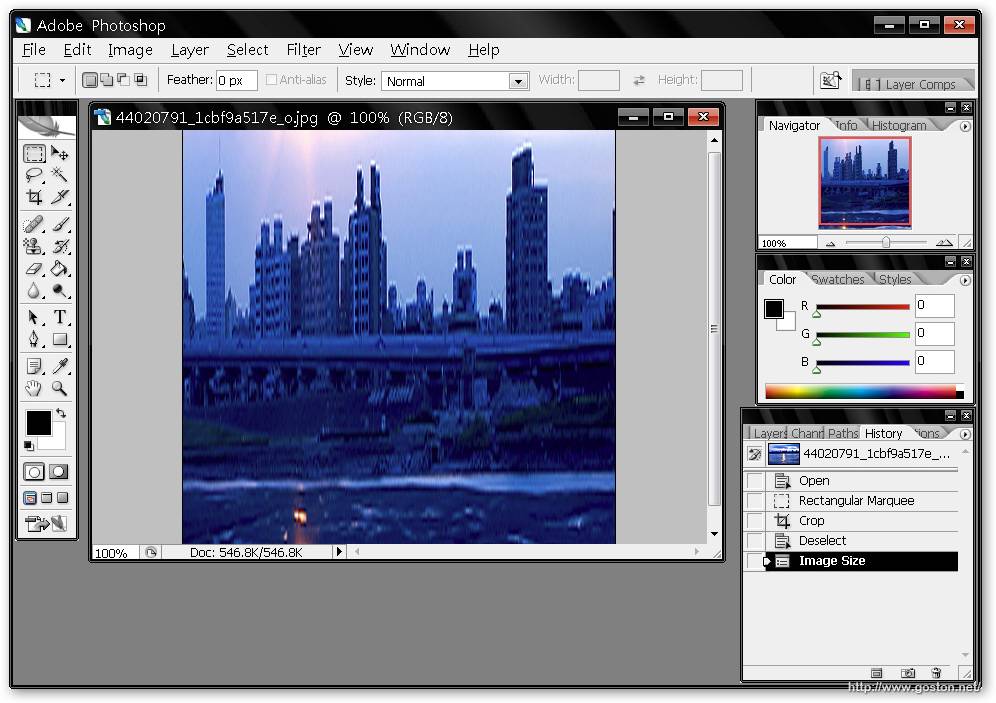
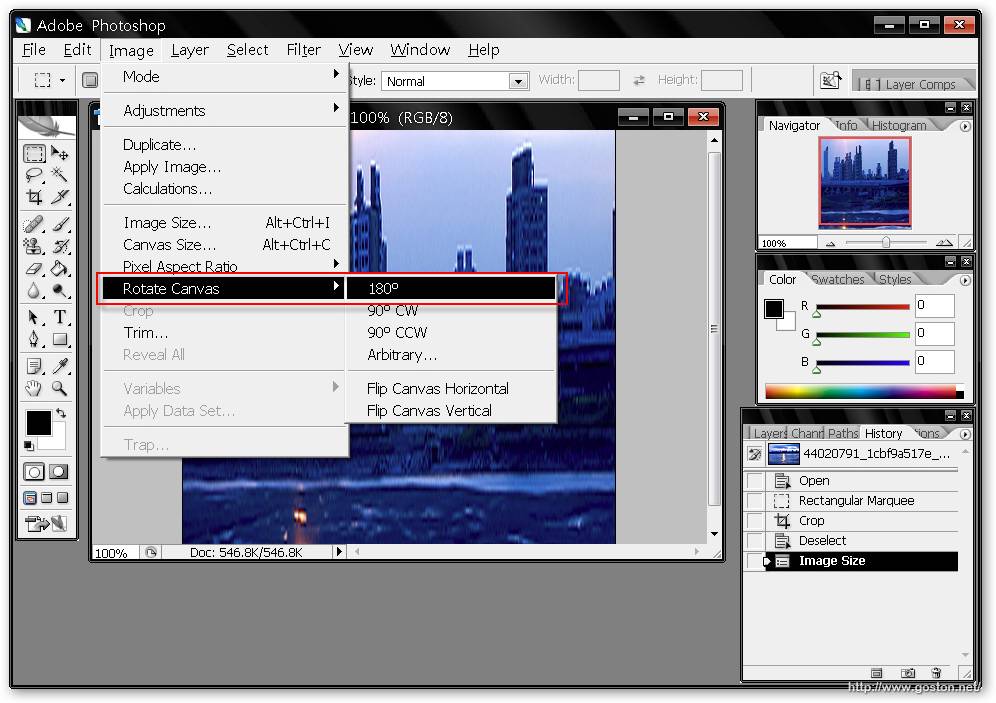
將影像做 180 度的翻轉:
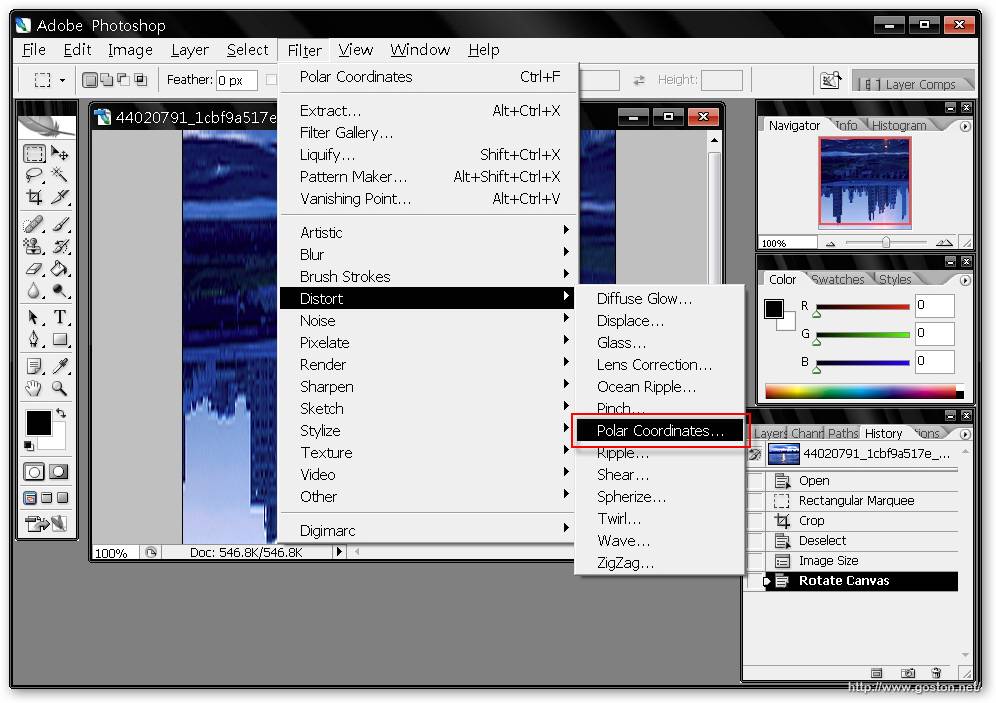
再將選擇「
濾鏡
」->「
扭曲
」->「
Polar Coordinates
」(不好意思, 這項的中文我不會翻), 然後會出現一個對話框, 直接按下「
OK
」鍵:
可以發現影像變成一顆小地球的樣子了:
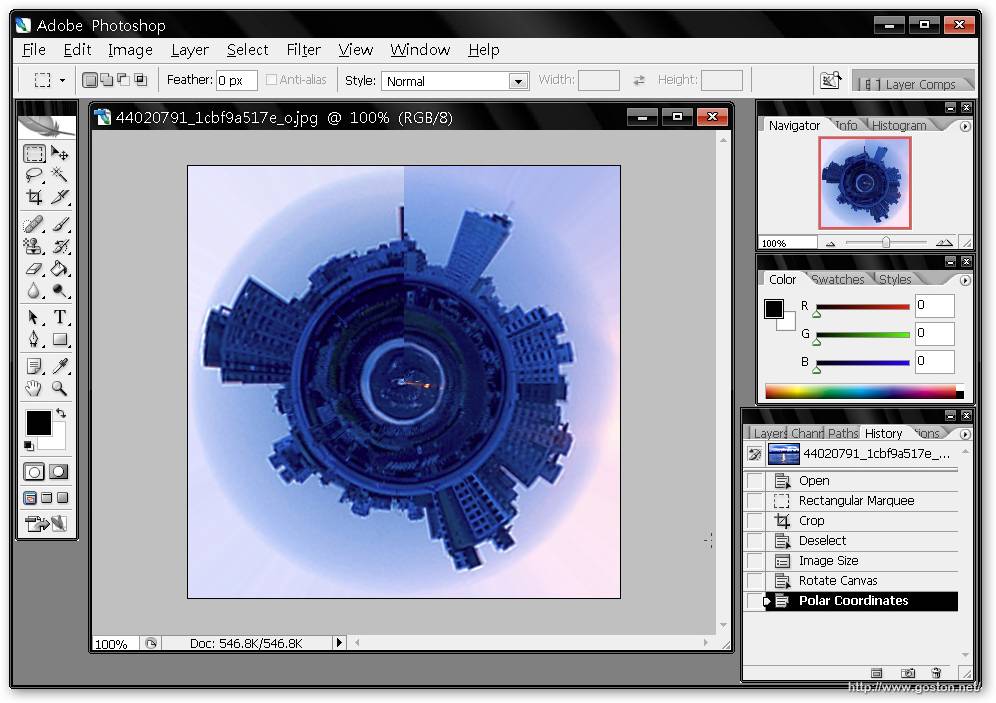
接下來按「
Ctrl
」+「
T
」將地球旋轉到想要的角度, 然後將影像接縫處修整, 讓接縫看起來不要太明顯即可。
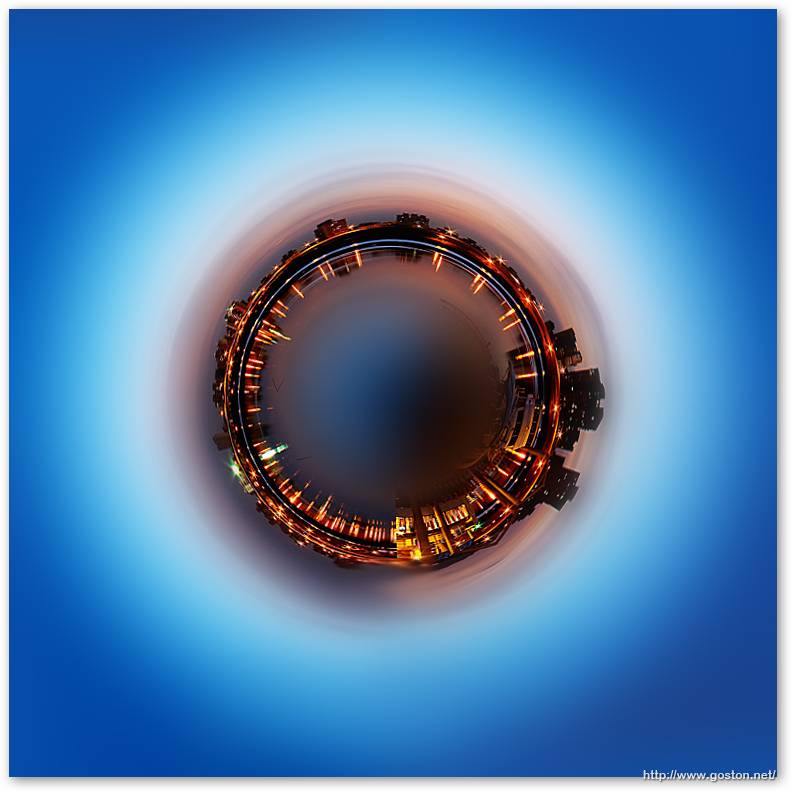
下圖就是我做的完成圖:
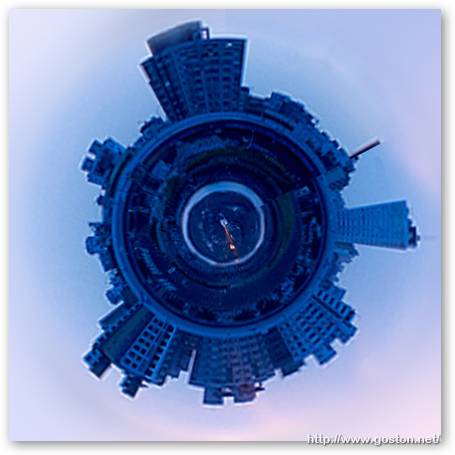
很有趣吧! 建議大家用環景圖來接會有更好的效果哦!
那個濾鏡在中文版應該是叫旋轉效果:D
很棒的特殊效果,讓我也想試試看:)
咦……我選的是「極座標」就有這種效果了XD|||
真的非常漂亮~!!
感謝 Goston 分享~ ^^